
This was a pretty easy -and affordable -project!
We adore our chaise lounge couch, but the original pillows left a little to be desired. My boyfriend was especially not fond of the purple colors.


So I set out to find something a little more our style.
I have no problem doing some basic sewing so knew that I wanted to make some pillowcases for the existing pillows. I found the PERFECT fabric at Pendleton - for just $84 - way out of our price range.

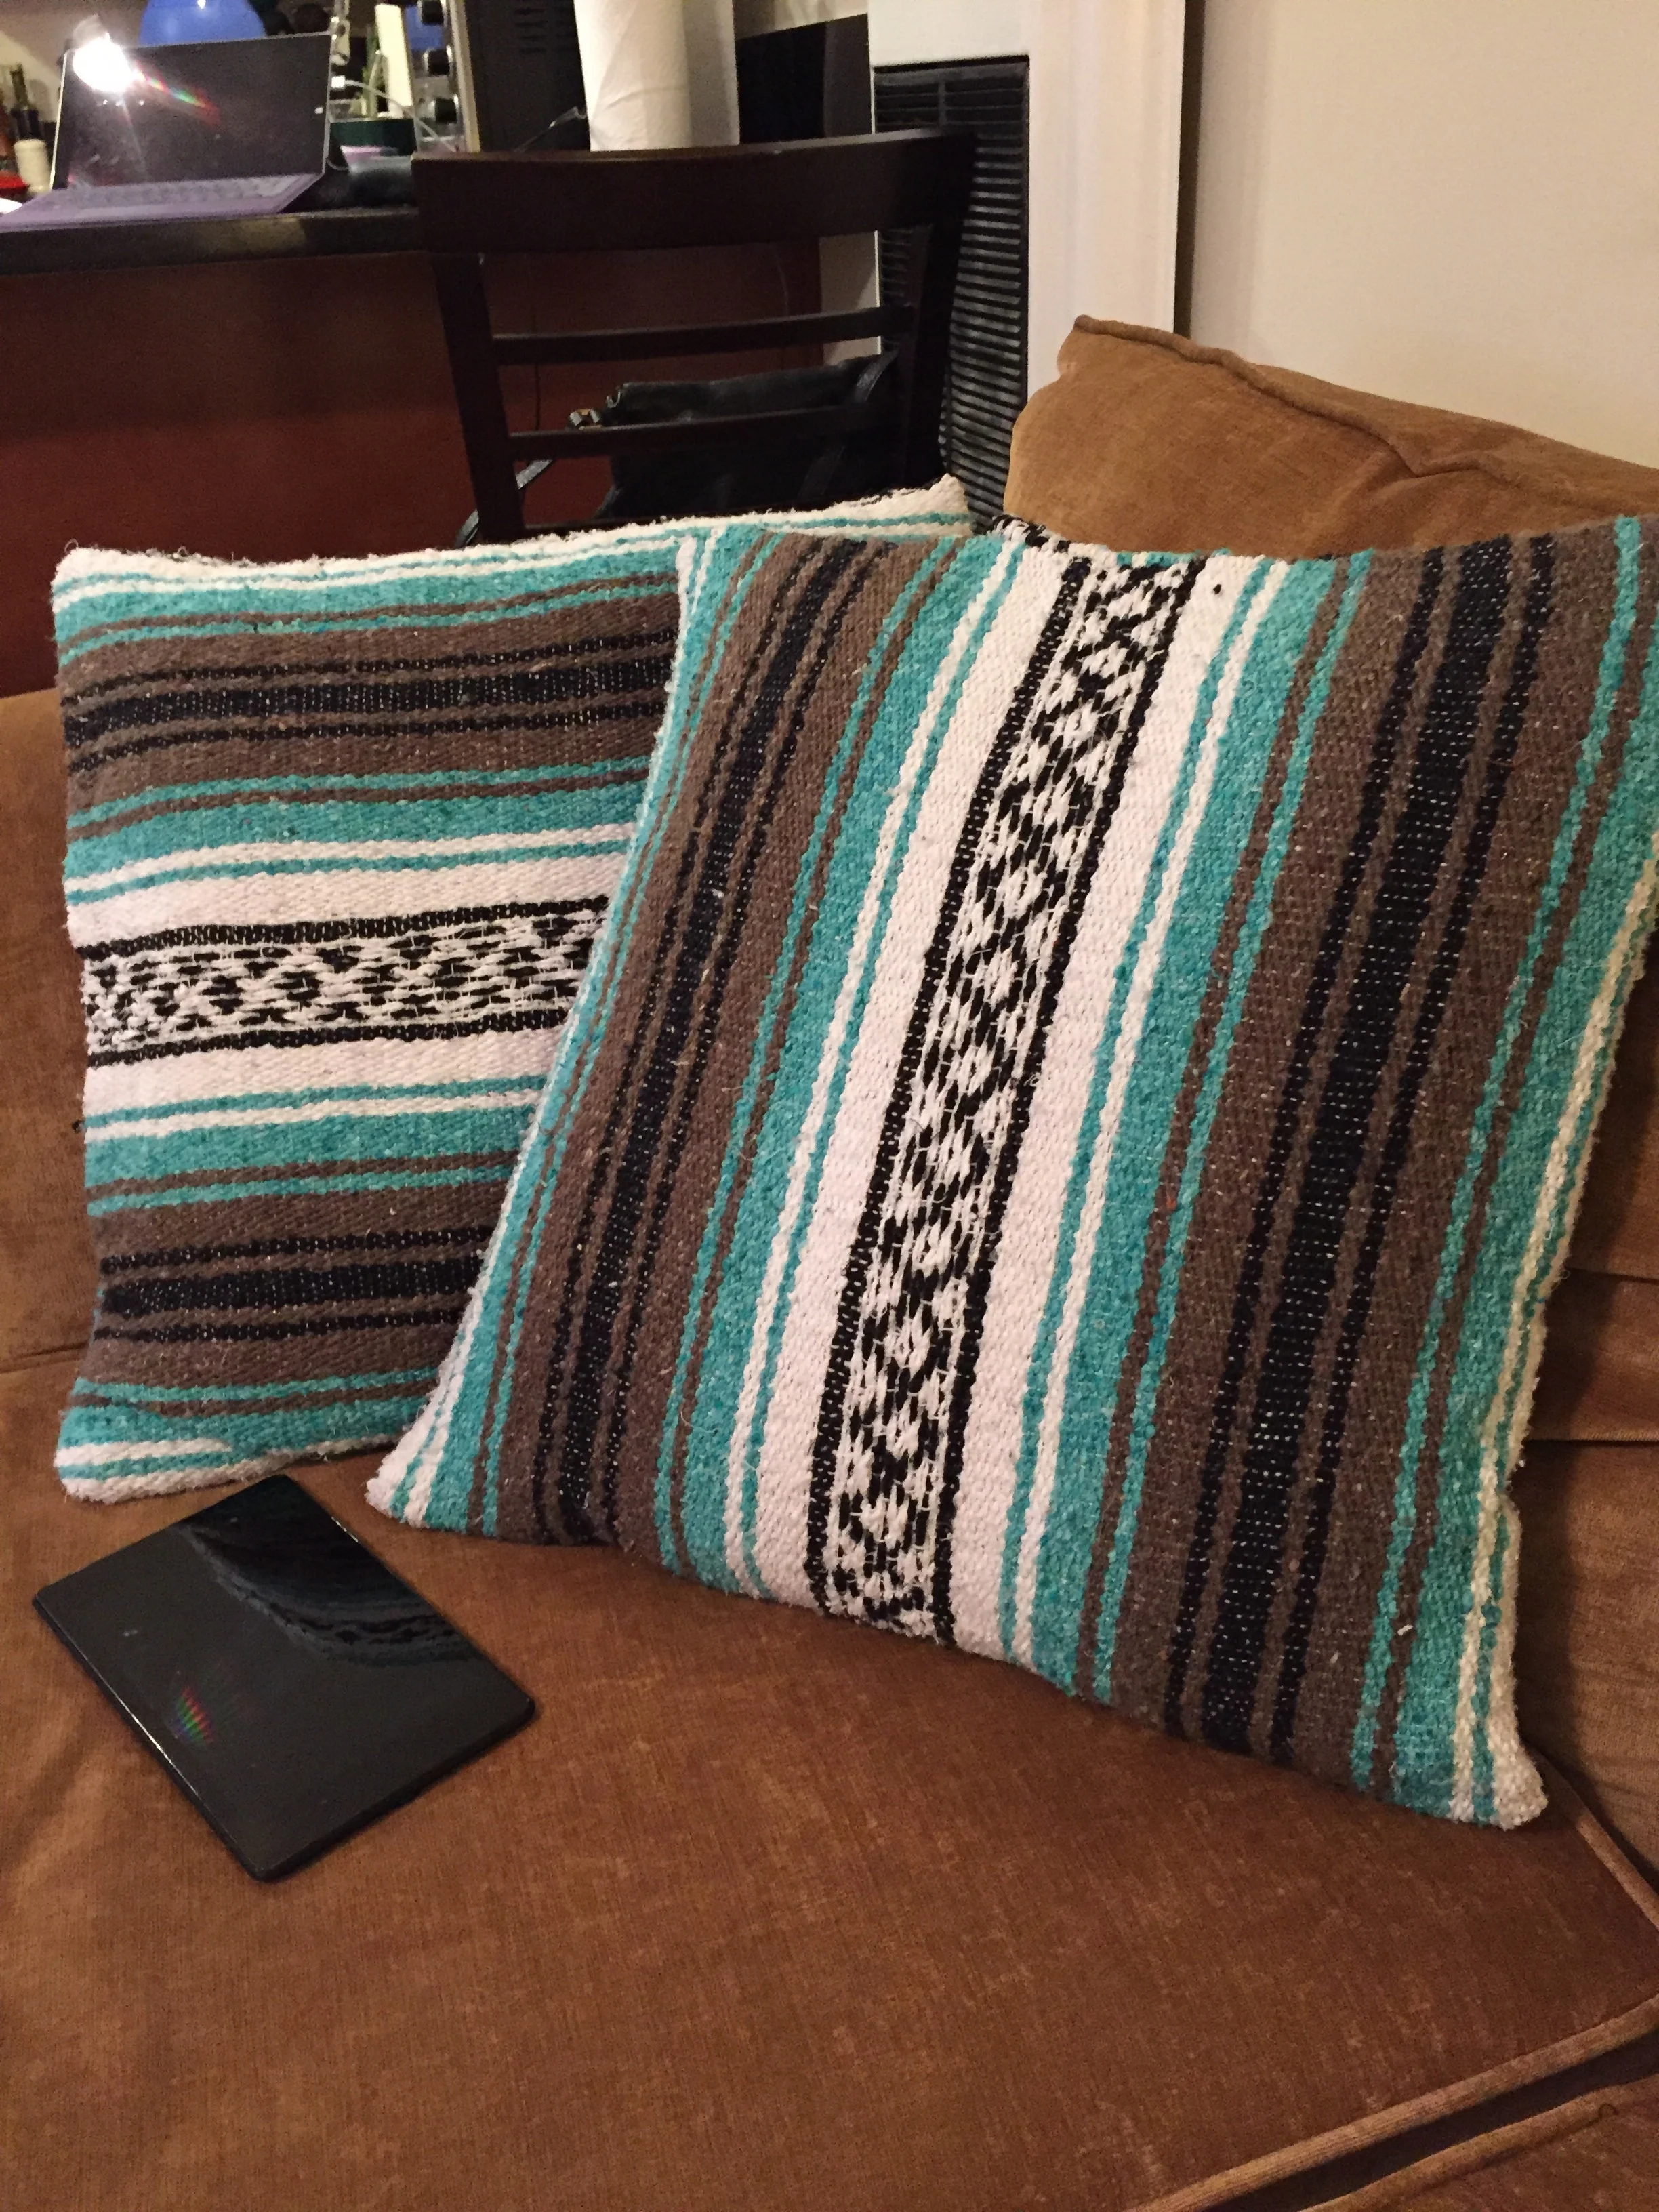
Since I live in LA, I decided to take advantage of the local offerings and make a trip down to Olvera Street where I commonly buy Mexican Falsa Blankets which are perfect for beach days and picnics. At a price of $10-$12 each, I knew this would be a more affordable option.

I picked out two Falsa Blankets in colors that would work with my room for just $24.
From there, it's just a matter of measuring your pillows and making a basic pillowcase.
This fabric is REALLY stretchy so here are some tips:
- Cut one long panel and cut to size. For example, if your pillow form is 20x20", cut a panel that is 20" wide. I used a 6" overlap in the back for mine so cut my panel 46"long (20"front + 20"back + 6"overlap). Due to stretch, it's not necessary to add a seam allowance.
- Make sure that the stripe or whatever detail you want to highlight on the front of your pillow is in the center of your panel. Ex: for a 46" panel, measure 23" from the center of the stripe you want in the center.
- USE ZIG ZAG stitching and fold over hemming techniques to prevent fraying and unraveling.
- Dont get anxiety about stitching in a straight line or making a mistake. The fabric is EXTREMELY stretchy and forgiving
- Using the fringe from the ends will require a 3 panel pillowcase construction. Use zig zag to edge the raw fabric edge, fold over twice (like a pants hem) and sew down using straight stitching. Sew the right side of this panel to the wrong side of your panel with the fringe so that right sides of both panels are facing out. Complete as normal.


