
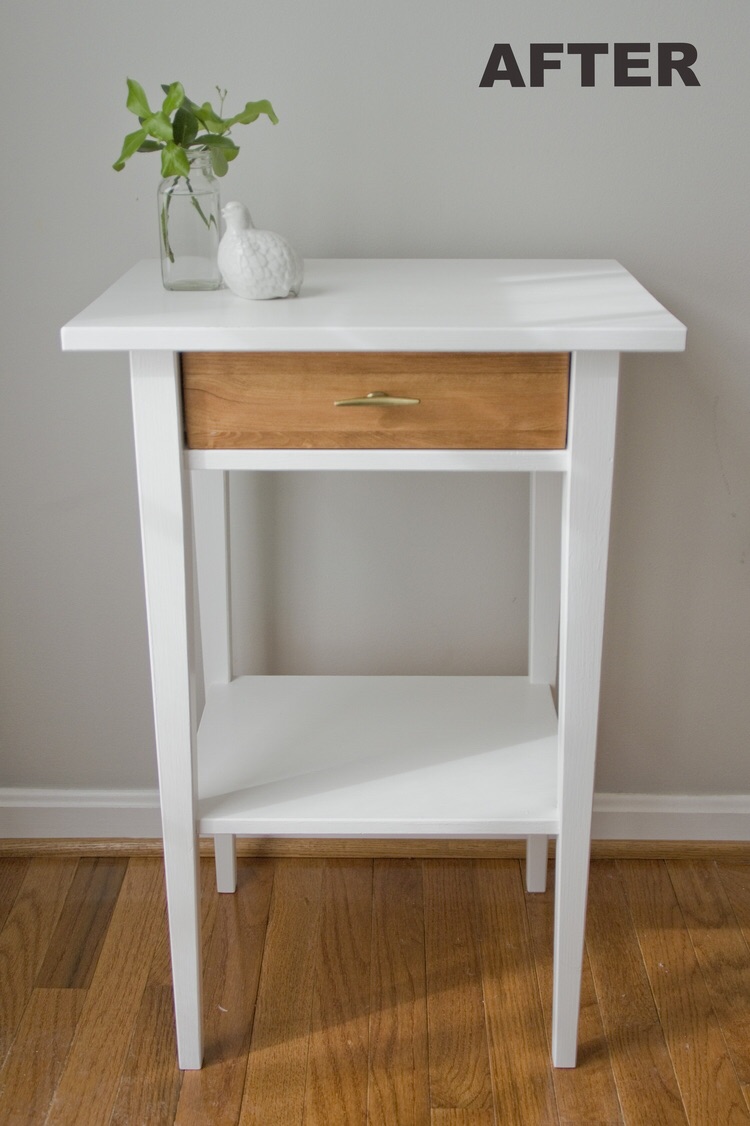
We ended up purchasing the IKEA Nordli bed frame and Nightstands for our new apartment. We loved the simple design, but upon getting it home it was a little TOO simple.

Before
I found my inspiration on Beautiful Protest - an IKEA Hemnes nightstand remix
I loved the wood front look, but unlike Hemnes, the drawer fronts of Nordli appeared to be just laminate covered particle board - sanding to reveal beautiful wood grain wasn't an option.
I started researching sticky back wood veneer but found that most veneers came in large sheets (way more than I needed) and ranged from $50+ (way more than I wanted to spend).
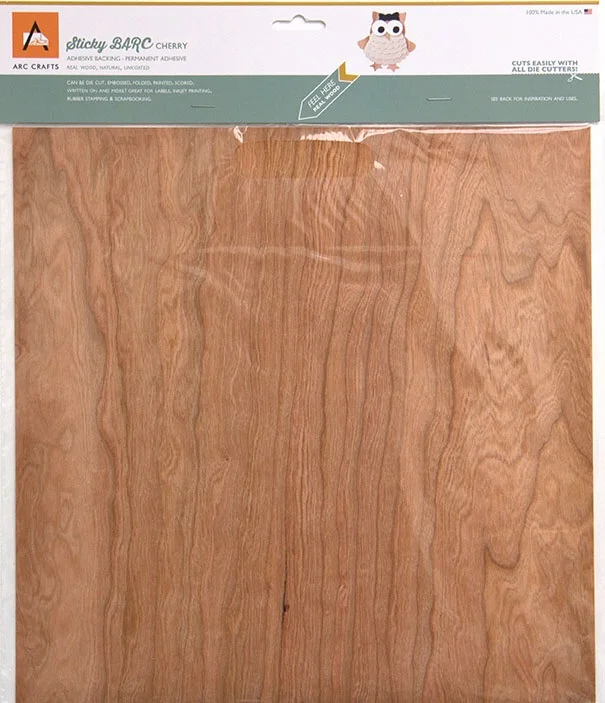
That's when I found the 12x12" sheets of sticky backed real wood veneer - Barc Wood made by ARC Crafts.
Since it's made for crafts and scrap booking, I wasn't sure if the veneer was thick enough to work for my project, but at an almost $40 price difference between the Barc Wood and the larger wood veneer sheets, I decided to give it a shot.

Now that I had the veneer picked out, it was time to choose hardware. The drawer was functional without a drawer pull, but I wanted something to break up the space. I decided to splurge on a pair of leather pulls from Anthropologie.

Assembly was pretty easy! The drawer front just requires two plastic screw grips to be loosened with a flat head screwdriver. Once the drawer front was off, we measured and drilled a hole for the drawer pull in the center. [Note, depending on what type of hardware you choose to use, make sure that your screws don't interfere with the shelf inside the nighstand]

Barc Wood trimmed and applied using adhesive backing to both drawer fronts. Polyurethane coats drying.

I picked this tiny can up at Home Depot for under $5
To apply the veneer you just peel off the back, position, and stick onto the drawer front. Use a rubber eraser to smooth out any air bubbles. Place the drawer front side down and use an x-acto knife to trim the excess from the sides. Finish by rubbing a few coats of polyurethane on with a rag. Let dry and use a small Phillips head screwdriver to poke a hole through the veneer for the hardware. Put on the hardware, put the drawer front back on, and you're done!


