So, I've had my IKEA Besta for about a decade, and it's been through some slow changes...
Here are the basic ingredients:
BESTÅ Frame, white
Article Number: 102.458.46
Dimensions: 47 1/4x15 3/4x25 1/4 "
$60
BESTÅ Frame, white
Article Number: 302.458.50
Dimensions: 23 5/8x15 3/4x25 1/4 "
$45
The BESTÅ VASSBO Glass Door I have has been discontinued, but here is IKEA's current alternative:
SINDVIK Glass door, white
Article Number: 902.918.58
Dimensions: 23 5/8x25 1/4 "
*Be sure to buy hinges, sold separately
$25
And the original BESTÅ round aluminum legs have also been discontinued, but below is IKEA's current alternative at the same price point:
STUBBARP Leg, white
Article Number: 102.935.64
$10 for package of 2 Legs

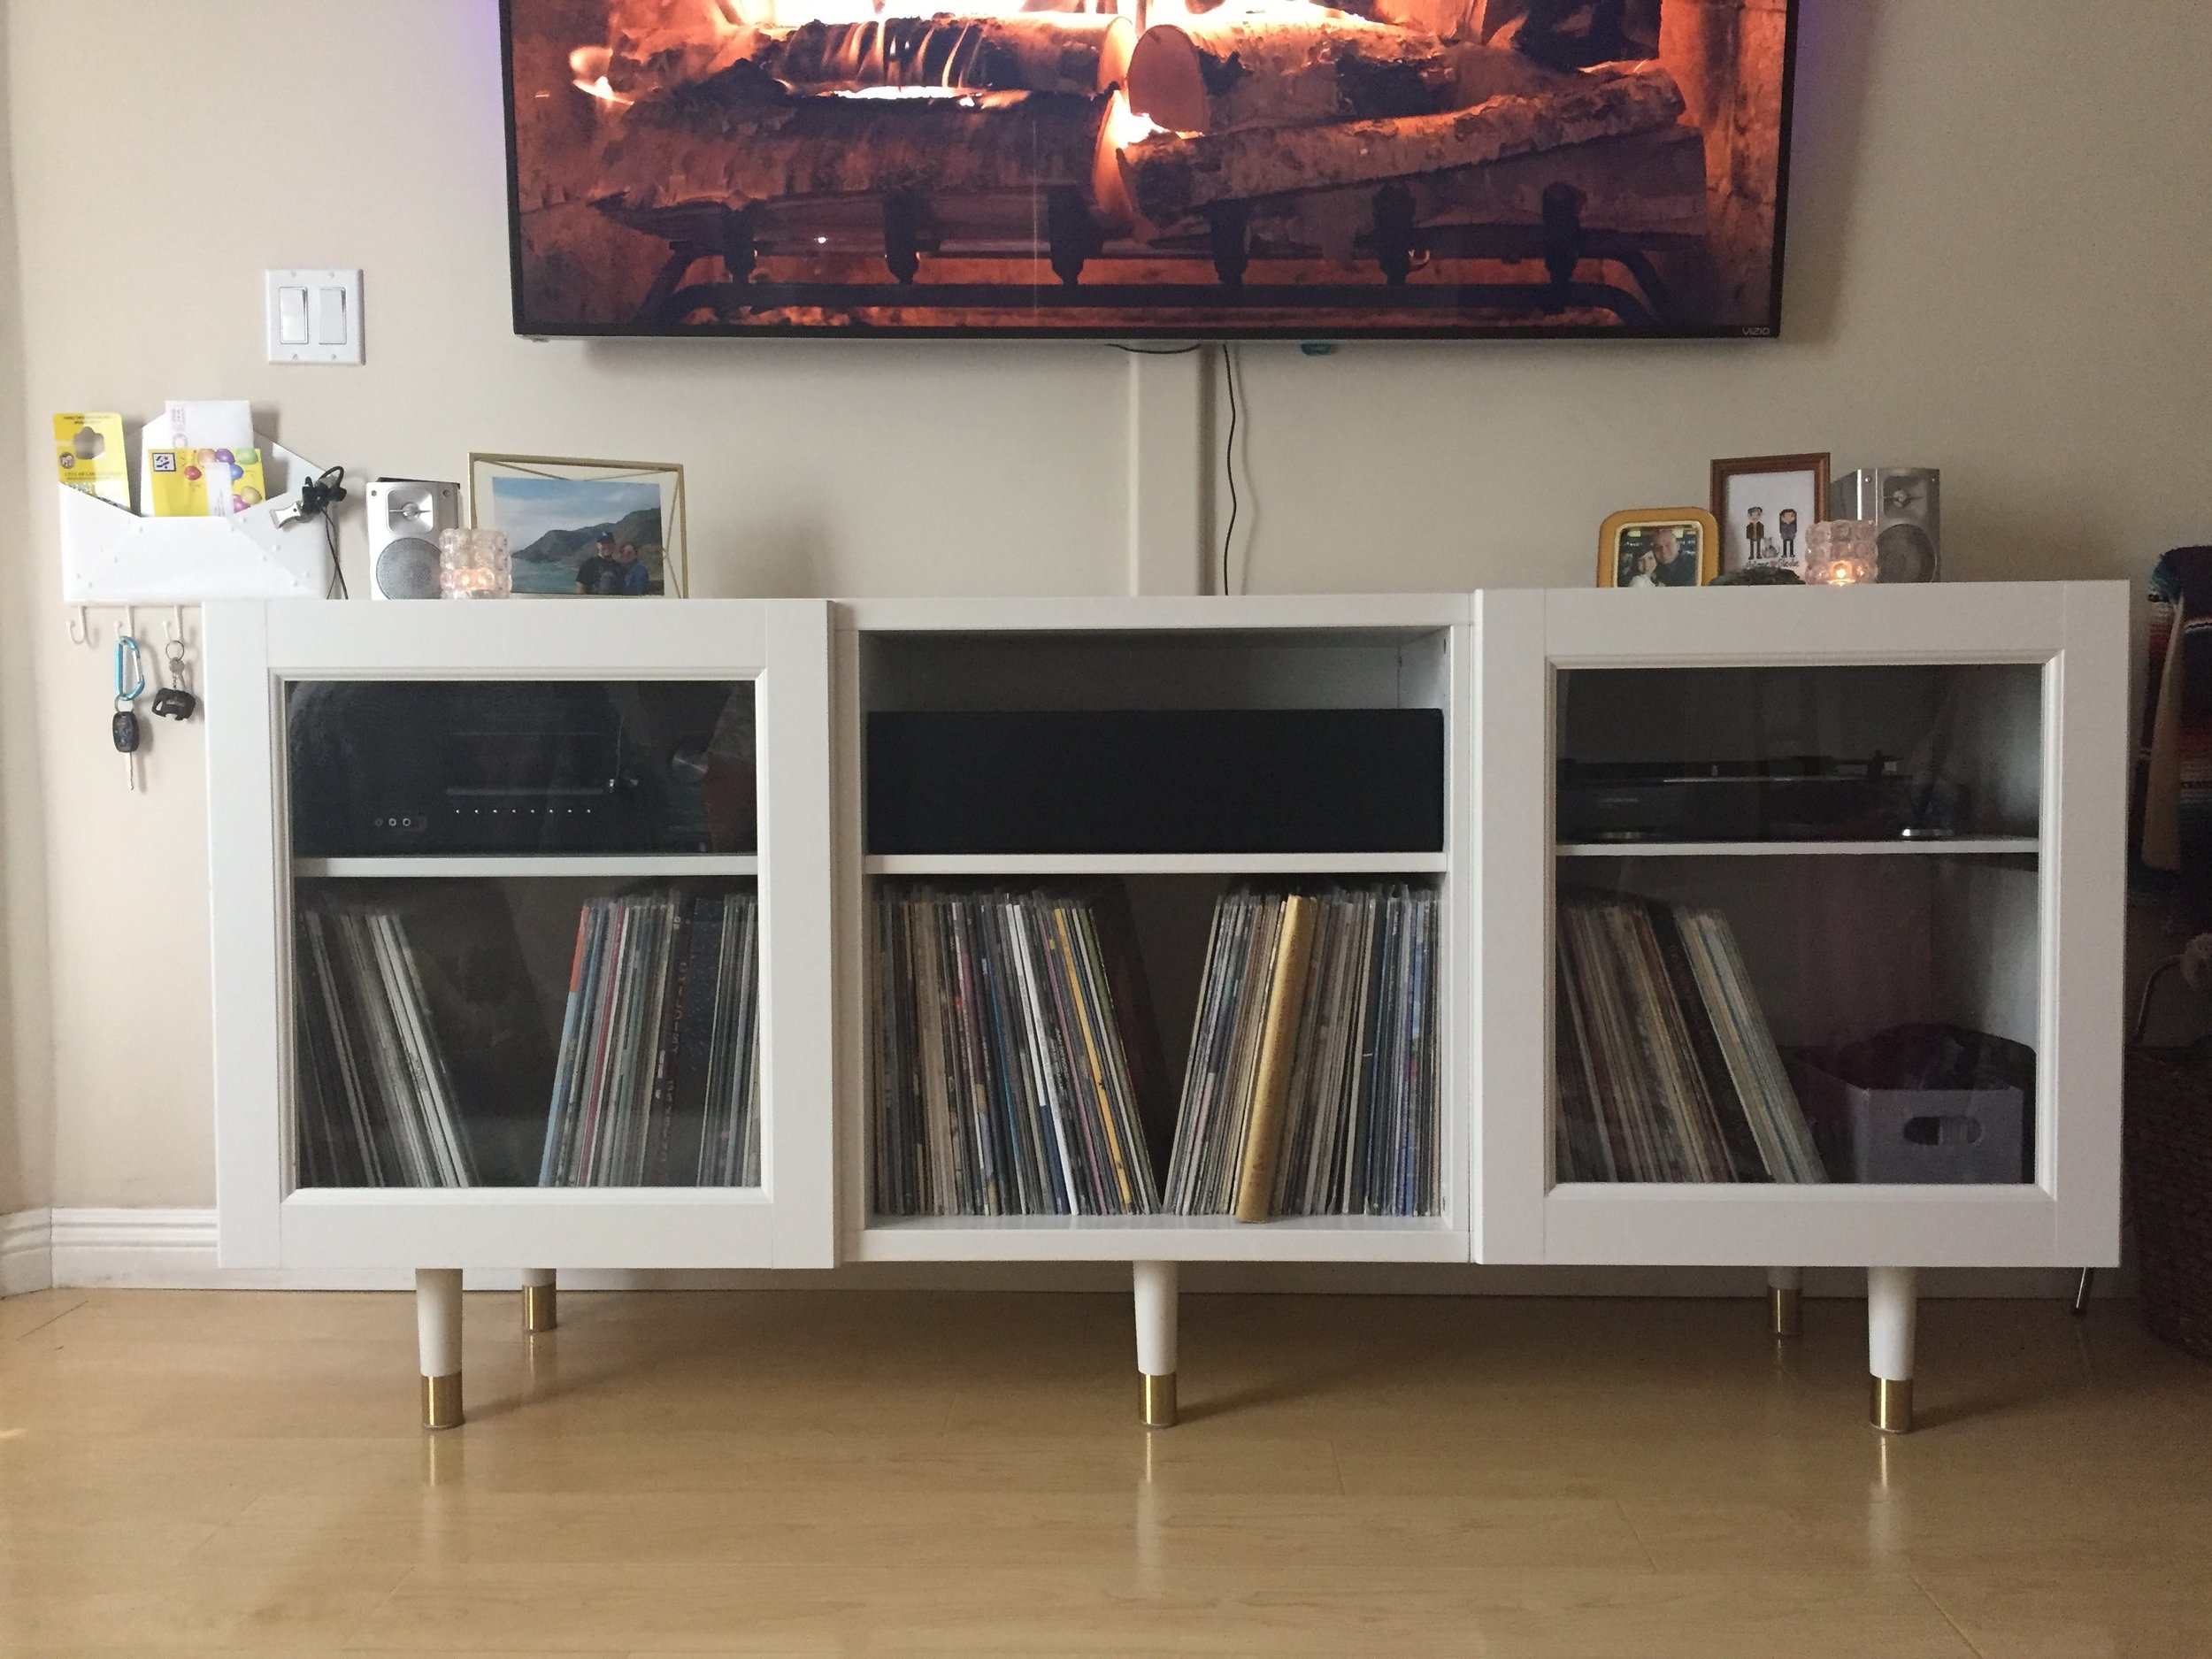
The original setup circa 2013
Once we got the piece to our new place it looked virtually unchanged...

But once we got the larger TV and wall mounted it and bought a front facing speaker for the middle cabinet (and removed the door in that section), the customization started!

We started by securing the smaller frame to the larger 2 unit frame using the suggested screws IKEA recommended in their BESTA product description (since we wanted to be sure they would be secure). We didn't have the screws from when I originally purchased the BESTA system but we were able to get them at the store's customer service area.
We then added 6 Estelle 170 White legs from Pretty Pegs. And because we chose to re-position the new legs from the previous IKEA holes, we also ordered 6 of their Universal Fitting Plates.

The legs helped a TON. But now that we had wall mounted the TV, I wanted to incorporate a slide-out turntable drawer to give us more streamlined space on top of the cabinet.
IKEA used to sell INREDA, a sliding metal frame for BESTA that you could customize to create a shelf. But of course, the metal frame has been discontinued for US IKEA so I decided to do a mod.
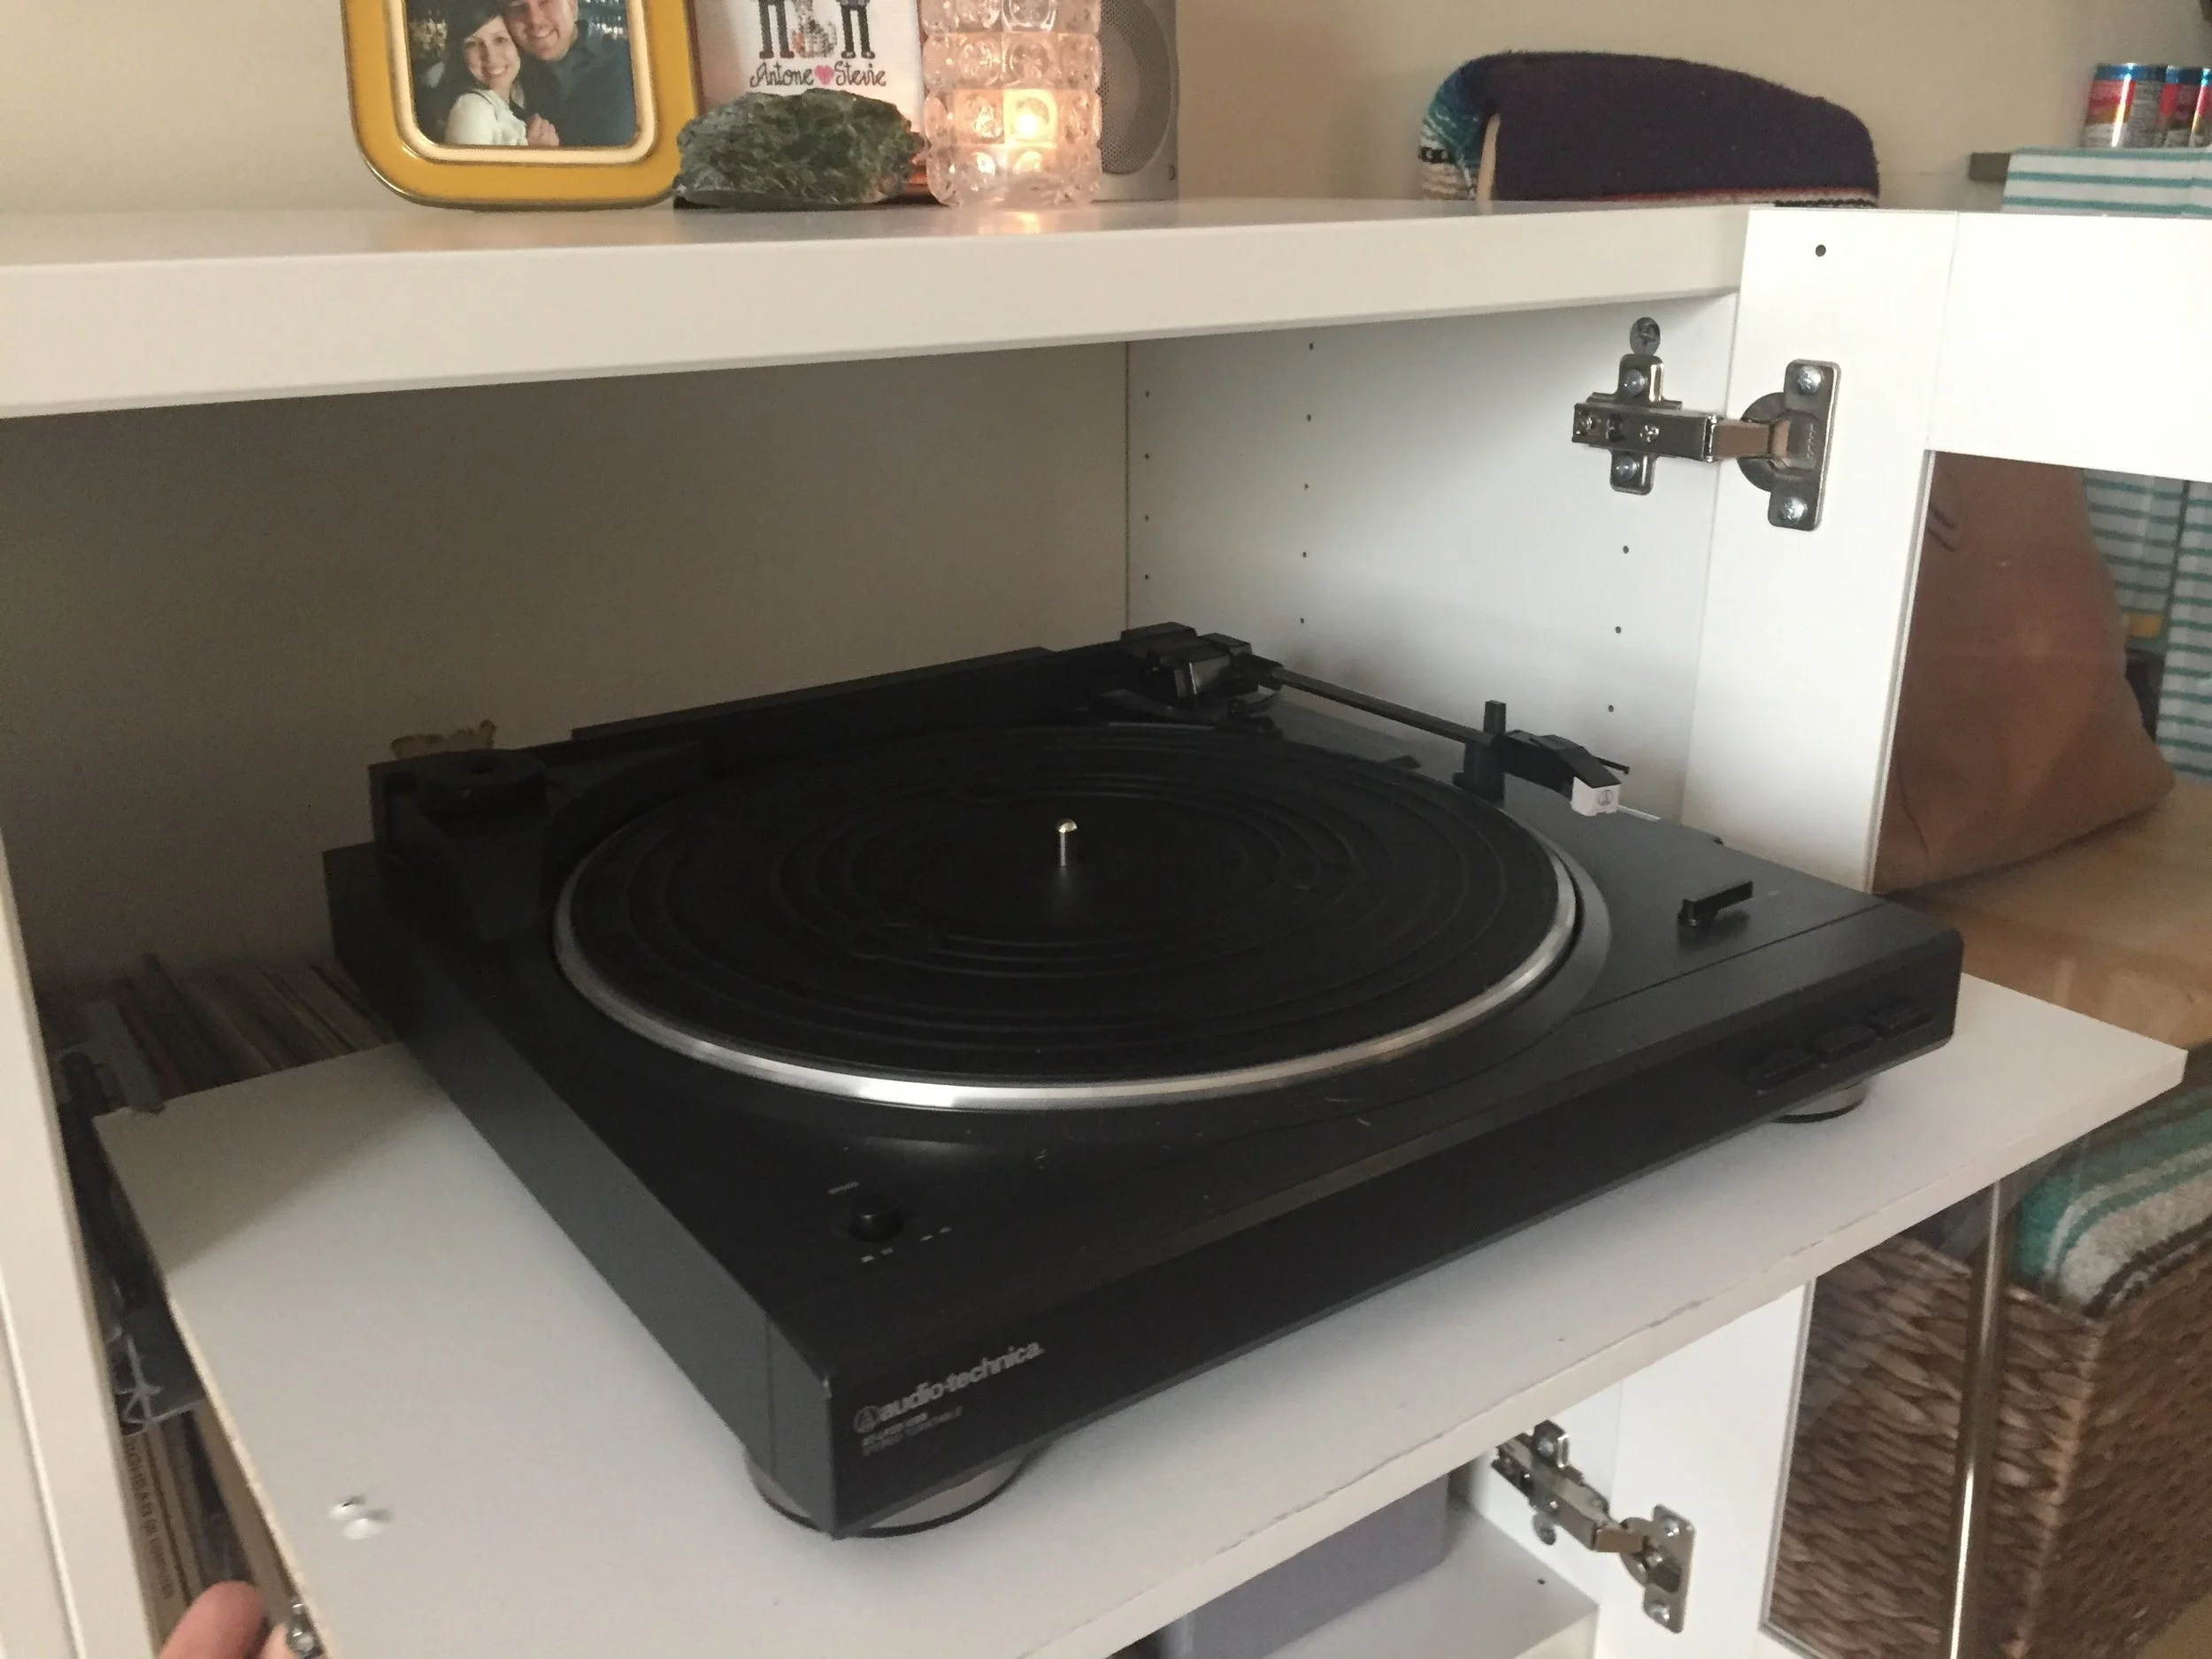
I purchased the BESTA drawer frame for $10 and coordinating BESTA soft closing drawer runners for $10/2 pack from IKEA with the hope of somehow hacking it to make a pull out turntable shelf.
After spending some time assembling the drawer and inspecting the mechanics, I installed the section of the drawer runner and realized that just the bottom part of the drawer would be enough material for this hack! The size was meant to clip perfectly in the back of the drawer runners and I used one of the included small screws (per side) to attach the shelf-bottom to the bracket from the underside. This was the toughest part of the whole thing because it required marking and pre-drilling (as you can see in the photo, I didn't measure well the first time), but didn't take more than 5 min to figure out and complete.
I ordered white iron-on melanine edgebanding from Amazon for just under $8, ironed it along the exposed edge, and trimmed off the excess with an xacto knife. Finally, I drilled a small hole in the back of the cabinet for the cords to pass through
*Note - this really will only work if you have doors to cover the exposed brackets on each side*

That's it! For now..... :)
Update: At the request of a reader, I’m adding some additional photos of the drawer hack.

Front view of the ‘drawer’.

Side view of ‘drawer’

Underside of ‘drawer’